Productos
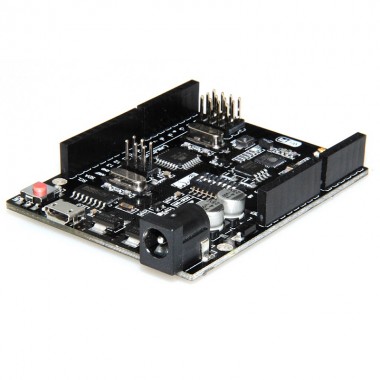
WiFi R3 ATmega328P+ESP8266 (32Mb memory), USB-TTL CH340G

OFERTA POR RENOVACION DE STOCK!!! Versión personalizada de la clásica placa Arduino Uno R3. Integración completa del microcontrolador Atmel ATmega328, el IC Wi-Fi ESP8266 con memoria flash de 32 MB y el convertidor USB-TTL CH340G en una sola placa! Todos los módulos pueden funcionar juntos o de forma independiente. Se alimenta con tensiones de 6 a 9 voltios.
COD: HTHS0163
Peso: 0.043 Kg
Disponibilidad: Sin Stock
ARS 14990.00
El producto no está disponible para la venta en este momento
Características
Description:
It is a customized version of the classic ARDUINO UNO R3 board. Full integration of microcontroller Atmel ATmega328 and IC Wi-Fi ESP8266 with 32 MB flash memory, and USB-TTL converter CH340G on one board. All modules can work together or independently.
On the board where the switch of mode of operation with 8 position
Switch status and mode selection:
|
|
1 |
2 |
3 |
4 |
5 |
6 |
7 |
8 |
|
CH340 connect to ESP8266 (upload sketch) |
OFF |
OFF |
OFF |
OFF |
ON |
ON |
ON |
NoUSE |
|
CH340 connect to ESP8266 (connect) |
OFF |
OFF |
OFF |
OFF |
ON |
ON |
OFF |
NoUSE |
|
CH340 connect to ATmega328 (upload sketch) |
OFF |
OFF |
ON |
ON |
OFF |
OFF |
OFF |
NoUSE |
|
Mega328+ESP8266 |
ON |
ON |
OFF |
OFF |
OFF |
OFF |
OFF |
NoUSE |
|
All modules work independent |
OFF |
OFF |
OFF |
OFF |
OFF |
OFF |
OFF |
NoUSE |
After choosing the mode of the board can proceed to setting up the IDE
It is important that when the ESP8266 module is programming, it is necessary to press the button “Mode”
To begin open the Arduino IDE programming environment and go to settings
Then in the window that appears in the row Additional Boards Manager URLs (marked in red) insert http://arduino.esp8266.com/stable/package_esp8266com_index.json link for installation in Arduino IDE additional scripts that would work with the modules ESP8266, and click OK
Then go to the Tools> Board> Boards Manager
In the window that appears, scroll through the list down to the script esp8266 by ESP8266 Community and click.
In the lower right corner will be able to select the version of the software, select the version 2.1.0 (the newest) and click the Install button
After installation, close the window and go to Tools> Board and see the list of available devices on the chip programming ESP8266
Next, you need to select the card as shown in the picture (Generic ESP8266 module)
Select the upload speed - 115200
Code Example:
==========test sketch===========
void setup()
{ Serial.begin(115200);
pinMode(13,OUTPUT);
delay(500);
Serial.println("AT+CIPMUX=1");
delay(2000);
Serial.println("AT+CIPSERVER=1,5000");
delay(2000);
Serial.println("AT+CIPSTO=3600");
delay(2000); }
void loop()
{ while(Serial.available())
{ char Rdata;
Rdata=Serial.read();
if(Rdata=='A'|Rdata=='a')
{ digitalWrite(13,HIGH);
delay(50); }
else if(Rdata=='B'|Rdata=='b')
{ digitalWrite(13,LOW);
delay(10);
digitalWrite(13,HIGH);
delay(10);
digitalWrite(13,LOW); }
else
{ digitalWrite(13,LOW); } } }


