Productos
FTDI Basic Breakout - 5V

Nueva versión FTDI para comunicación USB con Arduino (y clones) de 5V.
COD: SFDEV09716
Peso: 0.005 Kg
Disponibilidad: En Stock
ARS 26540.00
El producto no está disponible para la venta en este momento
Características
Description: This is the newest revision of our FTDI Basic. We now use a SMD 6-pin header on the bottom, which makes it smaller and more compact. Functionality has remained the same.
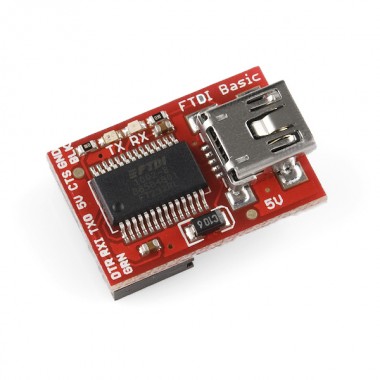
This is a basic breakout board for the FTDI FT232RL USB to serial IC. The pinout of this board matches the FTDI cable to work with official Arduino and cloned 5V Arduino boards. It can also be used for general serial applications. The major difference with this board is that it brings out the DTR pin as opposed to the RTS pin of the FTDI cable. The DTR pin allows an Arduino target to auto-reset when a new Sketch is downloaded. This is a really nice feature to have and allows a sketch to be downloaded without having to hit the reset button. This board will auto reset any Arduino board that has the reset pin brought out to a 6-pin connector.
The pins labeled BLK and GRN correspond to the colored wires on the FTDI cable. The black wire on the FTDI cable is GND, green is CTS. Use these BLK and GRN pins to align the FTDI basic board with your Arduino target.
This board has TX and RX LEDs that make it a bit better to use over the FTDI cable. You can actually see serial traffic on the LEDs to verify if the board is working.
This board was designed to decrease the cost of Arduino development and increase ease of use (the auto-reset feature rocks!). Our Arduino Pro boards and LilyPads use this type of connector.
One of the nice features of this board is a jumper on the back of the board that allows the board to be configured to either 3.3V or 5V (both power output and IO level). This board ship default to 5V, but you can cut the default trace and add a solder jumper if you need to switch to 3.3V.
Drivers:


